Reinforcing the Roof
With the additional weight of our roof basket and the camping gear we carry in it, we began to notice some weakness in the roof. The roof didn't seem to be able to support a load in the front third of the factory load-bar track. Applying weight caused the track and roof to deflect downward, and the rack's inertia would cause the roof to vibrate while driving over rough terrain. During our recent trip to the Four-Corners area the vibrations went from occasion vibrations to non-stop vibrations even when we were driving on smooth roads and the interstate. It had become severe enough that it was time to investigate and see if I could stiffen things up.
What We Found:
To gain access to the roof I began by removing the headliner from the 4Runner. This required pulling all the interior plastic side panels out; from the rear all the way to the front A-pillar. This process is fairly straight forward and can be accomplished in very little time. Once the panels were removed, I began removing the grab-handles, dome lights, rear-view mirror, sun visors, and the four plastic push fasteners holding the headliner in place.
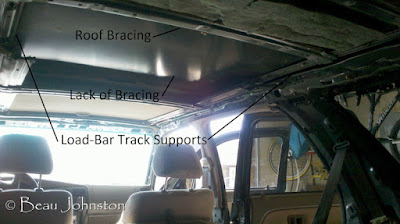
With the headliner removed, the structure supporting the weight of the load-bar track became visible. Each track is supported by a stamped sheet metal channel which runs directly below and sandwiches the roof between the two. Two braces run between the load-bar track supports to add overall rigidity to the roof structure. To allow room for the sunroof to be retracted, the front one-third of the roof is left unbraced. I believe this lack of bracing is the cause of our vibration issues.
To gain access to the load-bar track supports and give me a little more room to work, I lowered the rear of the sunroof assembly and discovered another potential source of weakness. Directly behind the B-Pillar is a threaded weld-stud that ties the cross-brace located behind the sunroof with bracket on the body structure.
How We Reinforced the Roof:
Materials Required:
- 10ea 6mm x 1 x 30mm hex-head stainless steel bolts
- 12ea 6mm stainless steel nylock nuts
- 22ea 6mm stainless steel flat washers
- 30ea 6mm stainless fender washers
- 2ea 3/16" x 1"x48" carbon steel flat bar
- RTV silicone
- Medium strength Loctite
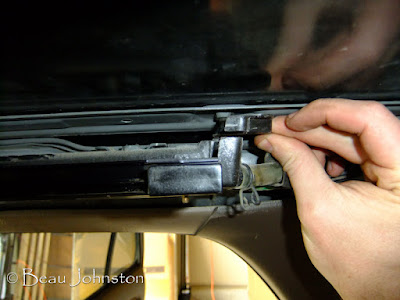
We then set out to reinforce the track supports with the flat bar. The sunroof track has a channel to collect any water that may leak into the vehicle and direct it back to the outside. The rear portion of these channels needed to be trimmed down by roughly 3/8" to allow the flat bar to be installed.
 |
| Modifying the water channel |
 |
| New bolts and washers with RTV Silicone applied |
I measured the distance between these bolts, marking out and drilling 5/16" holes in the corresponding locations on the flat bar. Because the roof cross-bracing sticks down below the track supports, the flat bar will need to be spaced off from the weld-nuts. We used three 6mm fender washers in each location, holding them in place with tape until the flat bar could be installed.
The addition of the flat bar essentially creates a laminate beam and better distributes the load applied to the front portion of the track to rest of the roof. This, in combination with the front nylock nuts, dramatically increased the roof's overall rigidity. Before we were able to push down on the front of the load bar track and the roof would deflect and now there is very little noticeable deflection. Time and a few back country trips will tell how well this modification really improves the load carrying capacity of our 4Runner's roof.


